Thursday, August 28, 2014

Ardusat Update: 2014/15 High School Students Working With Live Arduinos In Space

This is an update on the Ardusat program which was mentioned in a July post, "Sky's Not The Limit For Arduinos In Space."
Ardusat (from Kickstarter)

In an August 27 press release, Ardusat announced that their 'Arduino satellites' program is now available globally for K-12 students and teachers. ReadWrite has a pretty good article about Ardusat and their program in the recent post titled "Soon Students Will Be Able To Control Satellites In Space." It starts out with a overview of what the program consists of:
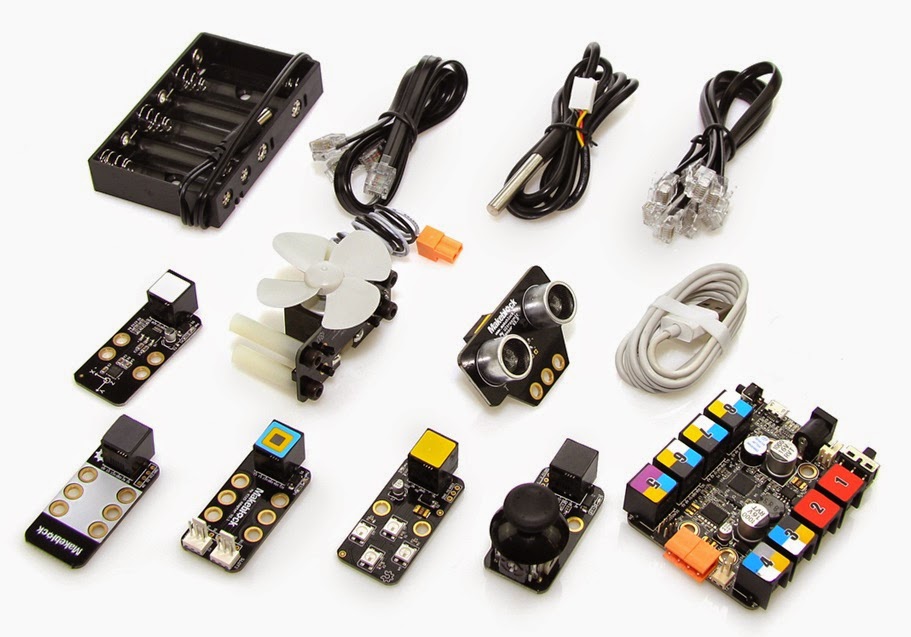
"...Ardusat is publicly launching a program to offer "space kits" with programmable sensors that it will place in small satellites in partnership with commercial satellite company Spire. The space kits cost $2,500, but the company has made the curriculum and online resources available for free...Ardusat is running a science competition beginning Sept. 2 to provide 15 high schools with a free space kit and the opportunity to work directly with an astronaut...more than two dozen schools are currently using Ardusat, and with its public launch, the kits are available to everyone...Ardusat's “space kits” contain an Arduino board—a cheap, widely available circuit board for DIY electronics projects—and multiple sensors that can be programmed to capture data on temperature, luminosity, and magnetic fields. The students can program the sensors using Arduino to test scientific hypotheses based on
Ardusat exploded view (from Kickstarter)
data that can be measured from satellite orbit—for example, finding the relationship between El Niño weather conditions and the ocean temperature near their schools...Satellite sensors will capture data and send it back to students in real-time, so classrooms can monitor how the experiment is performing each day.
"
The ReadWrite post also talks about one specific teacher and class that's working with the Ardusat program:
"Rachelle Romanoff is a physics and chemistry teacher...This year, Romanoff is bringing Ardusat to her 10th and 12th grade classrooms. Her AP Physics students are so excited to program sensors in space, some students enrolled in the class just for this particular project—she now has 23 students in the class...Because students can configure the sensors in real time, Romanoff says she'll be using Ardusat throughout the school year. Students will write code to then send to the satellites housing their particular project. It will be crucial in helping students understand concepts like electricity and magnetic fields. The satellites will send the data back down to Earth, and students can collect and view the data on their iPads, and make graphs out of the information received from space to observe patterns or work out hypotheses...As the Ardusat programming gets more advanced, and more satellites become available for students, Ardusat envisions more technical experiments like thunderstorm tracking."
I took an AP Physics class in high school, and would have loved it if we'd had access to sensors and microcontrollers (MCUs) on a satellite orbiting the earth. Can you imagine the cool projects a few creative, imaginative and determined K-12 student hackers will be doing in a few years on Ardusat's system and other cube sats or other type of education or general public satellites that get launched and have this level of access. Instead of writing "Space Invaders" in BASIC and playing it on Apple II or other early PCs, they'll be programming MCUs with the Arduino IDE (integrated development environment) or other program development tools to 'play' real-time "Orbital Space Spy," gathering real-life data in space and figuring out how to capture and package information that lets them become globally-recognized experts on their area of interest or sell information to governments or corporations.
Early breadboard circuitry for Ardusat (from ExtremeTech)

Like many other developer 'platforms,' the truly valuable and innovative outcomes from widespread access to microcontrollers, sensors and other related satellite components that can capture or generate information or physical products in space will be things that the satellite launch companies never expected. Students, teachers and others with access to this space equipment will first do weird, fun and somewhat pointless things with the equipment, as well as activities initially envisioned by Ardusats and other organizations, such as thunderstorm tracking. True hackers rarely work on ideas suggested by someone else as being valuable or appropriate. They'd rather work eight or twelve hours a day on
something they came up with on their own, something that fully engages them, something that no one else is doing as far as they know. Or something interesting to them that they think they can do much better than someone else.

The initial sensors in the Space Kit are listed on the Ardusat website as luminosity sensor, temperature sensor, magnetometer, ultra violet light sensor, infrared thermopile, and photoresistor. But I'm guessing Ardusats have a few more sensors onboard, either for testing or for unveiling at a future time to maintain interest in the program. Early on those student hackers will also come up with additional MCUs and related components that should be added to the next satellite launched, with a clear explanation of how those MCUs and components will be used. At least one of the student hacker 'improvements' will end up able to accomplish the purported task, but will turn out to have unexpected capabilities, either because someone figured out a new way to use the equipment or because the slightly-devious student hacker planned to use those capabilities all along but was intelligent enough to not tell people that before the equipment was launched into
space. These escapades will bring us ever closer to the day when scifi like "Space Cadet" by Robert Heinlein and "Live Free or Die" by John Ringo will be eclipsed by true life stories.

We haven't reached the hockey-stick inflection point yet for democratization of the civilian aerospace sector, but programs like Ardusat are getting us a lot closer to the tipping point. If you work with STEM programs at K-12 schools, I highly recommend you consider getting involved with Ardusat. And if you're a student hacker interested in space, I recommend you start planning your personal participation in off-planet computing.

**********

Sunday, August 24, 2014

MCU Music: Home Multi-zone Arduino Audio

Members of the Humboldt Microcontrollers Group have a more than average interest in microcontrollers (MCUs) and music, e.g. the Humboldt Laser Harp (HLH) and Raspberry Pi music systems.

We've got the proof-of-concept HLH working, but we need to take the next step in expanding the musical capabilities of the HLH. After I talk with Ed, Nick and others in the MCU group about how to most cost effectively improve the music from the harp, I'll write a post about electronic music component options. In the meantime, here's an MCU music topic I read about in an August 2014 Atmel blog post.
Custom PCB fabbed by OSH Park

The Atmel post points to an Instructables titled "The Smartphone Operated House-Wide Audio System" that talks about a system that:
"...solves the seemingly ubiquitous problem of being able to listen to your music from anywhere in your house. Say goodbye to a separate iPod dock in each room! This instructable will show you step-by-step how to build a house wide, multi zone audio system which can be entirely controlled from your Smartphone or computer (really anything with a web browser) from anywhere in your house which you have a Wifi connection...it's also expandable to however many zones you need...this system allows you to use speakers and amps of your choosing and at a fraction of the cost of a Sonos system. In this project we will be making use of an Arduino uno with an ethernet shield and a custom PCB which can be ordered from your favorite PCB manufacturer (I recommend OSH Park). The central component of the PCB is the PT2258 IC. This IC allows for volume control of 6 audio channels and communicates with the Arduino over the I2C bus."
Arduino with Ethernet shield and custom PCB with PT2258 IC
The Princeton Technology datasheet for the PT2258 IC shows the block diagram and pin configuration for this component. Reading over the Tutorialsto.com write-up about the IC will give you a general understanding of the component if you don't already know what it is.

Lepai LP-2020A+ amplifier
This MCU project is more complicated than some projects in other posts I've written, but it will give you good experience in doing activities like ordering a custom PCB (printed circuit board), soldering components on the custom PCB, and hooking up your fabbed and assembled custom PCB with a 6-channel amp and power supply. The Instructables has a pretty good set of photos showing how to solder the components on the PCB, so don't worry about that step if you haven't assembled many, or any, PCBs. The two amplifier options listed in the project write-up both look fun to work with; a Lepai LP-2020A+ for about $20 or a Parts Express AA-AB34181 for about $60.

The Instructables project author describes using the finished audio system this way:
Parts Express AA-AB34181 amplifier
"In order to maintain the idea of being able to control the system from a smartphone, I used a Chromecast with an HDMI audio extractor. This allows us to take the audio the Chromecast outputs and plug it into our PT2258 control board. Thus we can simply cast our favorite Pandora station or music from Google Play Music to the Chromecast and control the volume from our Arduino. Simply plug the Chromecast into a TV and set it up on your home network, then unplug it from the tv and plug it into the HDMI audio extractor. Using a RCA to 3.5mm cable, plug the HDMI audio extractor into the input of the PT2258 board...The system can be controlled by anything which has a web browser and is connected to your home network. All you have to do is type in the IP address of the arduino followed by "/?app" (i.e. 192.168.1.199/?app) and you will be brought to the control app for the system...The greatest limitation of this system is the fact that there is only one audio input for the entire system. That means you have to listen to the same song throughout the entire house."
This system costs about $300 to build, so I won't be putting one together any time soon, but the project gives a good overview of setting up a pretty versatile home audio system from scratch.

**********

Saturday, August 23, 2014

Daemon's Car(duino) Tracker

Daemon by Daniel Suarez is an excellent book for most people who are interested in microcontrollers (MCUs), and I'm currently in the middle of re-reading it. The MCU project in today's post, OpenTracker v2, is something that would have been right at home in Daemon.

OpenTracker (we'll drop the v2 suffix for the rest of this post) is an Arduino-based GPS / GLONASS vehicle tracker. The August 21 article in Electronics Weekly gives an overview of OpenTracker and mentions a couple use cases.
"This one could of interest to a Gadget Master looking to track moving objects, such as a vehicle. Want to monitor your elderly parent, perhaps, or keep an eye on your son or daughter’s first driving adventures...The people behind it, Tigal, are raising funds on the Indiegogo crowd-funding website...it’s actually the second version of the firm’s open source GPS/GLONASS vehicle tracking system...As well as tracking single or multiple vehicles, it also monitors the speed and altitude of the objects...The Arduino Due compatible module has an Atmel SAM3A8C ARM controller, a Quectel M95 GSM/GPRS modem and a Quectel L76 GPS/GLONASS module..."
OpenTracker v1
TIGAL just completed their Indiegogo effort to fund the development and launch of the second version of this moving object tracking device. Their Indiegogo campaign raised only €3,319 toward their funding goal of €50,000, so the new version of OpenTracker didn't get quick or strong uptake in the maker community or the general public. Because the Indiegogo effort was a flexible funding project, TIGAL, the developer of OpenTracker, keeps the money pledged. Also, TIGAL is an established Austrian company that sells the first version of OpenTracker online, as well as other products. The first version can be found online for €118.80 including 20% VAT.

Based on the online description of their company, TIGAL will likely continue development of the tracker's second version in spite of not reaching their crowdfunding goal. It will likely take longer for the second version to become available, so if you're interested in this 'open source'  moving object tracker, you should probably just buy the first version to learn on while waiting for the second one to appear. If you do interesting hacks with v1, TIGAL might want to have you be a beta tester for v2. Their website describes the company this way:
"TIGAL is a...international distributor and manufacturer of...innovative technological products.  TIGAL’s product line includes embedded Linux/Windows CE devices, M2M solutions, wireless devices, CAE/CAD, development systems and compilers, professional programmers, measurement tools, LCD and OLED displays and display modules with and without touch screen functionality, and speech recognition development tools and systems. TIGAL is also leading several OEM projects with its international partners...in the fields of SMS and MMS messaging, Voice Recognition and Linux-based development tools and embedded hardware."
If you're considering buying or building a GPS tracker, you might also want to look at a few of the
other open source trackers. I didn't do in-depth research to find out which have the best reputation, but here are a few links to get you started:
GeogramONE board
  1. GeogramONE (originally released as DSS Open Source Tracking Device on Kickstarter) -- $120.00 -- "The Geogram ONE is an open source tracking device based off the Arduino platform.  After a successful Kickstarter campaign, several hiccups in the manufacturing and assembly process, we're proud to announce the Geogram ONE is finally available for sale. We're selling the bare bones board here for development, however to take full advantage of it's capabilites you'll still need...accessories...The board also comes preloaded with firmware to use as a tracking device.  Communication is handled simply by send an SMS from your smart phone."
  2. RuuviTracker -- "...an open-source, electronic global positioning device as well as free
    RuuviTracker Rev C PCBs
    software. Our GSM- and GPS/GLONASS/Galileo-enabled tracking system can be used for various different tasks...it can be used to track your hunting dog, it can become your vehicle's alarm system, a portable weather station, a security system for your children...The device itself will be an affordable, water-proof, robust, high-quality and state-of-the-art product...We have, for example: 168MHz ARM Cortex-M4, GSM, GPS, GLONASS, Galileo, accelerometer, microSD, microphone, speaker etc. The device draws only few microamps during sleep, so even a small battery might last for several years. Additionally, our accelerometer is able to wake-up the device when it's touched
    ." Here's a link to the project status page on their wiki. They appear to have completed a Rev C PCB (printed circuit board) for their tracker in June 2014. 
  3. GPS Cookie (funded with a Kickstarter project in 2013) -- $89.00 -- Overview from
    GPS Cookie
    CNET
    : "The GPS Cookie runs on two AAA batteries and records data onto a microSD card you supply. It records data, time, and location to track your routes, letting you build up a history of your movements. That data can then be imported into Google Earth so you can visualize your travels. The idea behind the gadget is that you just carry it around and not worry about it until you upload the data to Google Earth and see your information. This could come in handy for travel abroad so you'll be able to locate that out-of-the-way Parisian cafe later. It can also be used to track bike routes, commutes, or just about any travel adventure."
  4. Adafruit Ultimate GPS on the Raspberry Pi -- From Martin O'Hanlon's blog post about this Adafruit GPS tracker: "I got myself one of adafruit's ultimate GPS breakout boards as I want to experiment with capturing GPS data in my car projects.  Its a seriously good bit of
    Adafruit Ultimate GPS on Raspberry Pi
    kit and if you looking for a GPS module you could do a lot worse than this.  They also have an excellent tutorial on setting it up with the raspberry pi...I used the raspberry pi's on board UART to connect to the GPS module, Adafruit advocate using a USB to serial device but that didn't suit my needs (I need the USB for other things). I also create a GPSController class in python to allow me to communicate with the module easily
    ."
I've never done a maker project with GPS tracking, but it appears there are a number of options for doing that with open source designs. If you want to track your child, your parent or a potentially wayward or nefarious client (I have no idea as to the legalities of any of those activities and IANAL) or if you want to clearly understand how someone might be tracking you, this post should at least point you in the right direction...

**********

Friday, August 22, 2014

Arc-Controller Motor Shield: More Power!!

The August 21 article "Arduino Motor Shield, Arc-Controller Launched By Arc Robotics" gave me a good reason to do a little research on microcontroller (MCU) motor control and motor shields.
Arc-Controller motor shield

The article covers the Arc-Controller, a new high capacity motor shield that has a Kickstarter campaign in progress, telling us:
"Maker, developers and hobbyists that enjoy building Arduino platform based projects might be interested in a new Arduino Motor Shield called the Arc controller which has been created by Arc Robotics...“There have been a lot of amazing projects come out of the Maker revolution, however, many are limited by the capability of their motor controller. We want to change that. The Arc-Controller is a bridge to bring high Amp motor control to your projects, up to 43 amps with a heat sink. It is capable of variable speed and direction control over a single Stepper Motor or two DC motors, because when do you only need one motor. The Arc-Controller is compatible with about any Arduino, or other micro controller such as Raspberry Pi. It runs an ATMega328, and is user programmable via the Arduino IDE."
The Kickstarter campaign still has 36 days to go, but it has gotten off to a very slow start, with only $927 pledged of the $41,500 funding goal. According to the Arc-Controller Kickstarter page,
"The Arc-Controller built around two H-Bridges. Each one can supply 43 amps of continuous current, with a properly mounted heat shield. The dual H-Bridges run separately, controlling two high-end DC Motors or as one controlling a single stepper motor. Built into the H-Bridges are current and temperature fail-safes.  If they begin to get too hot, or if they exceed the maximum current levels, current limiting will take affect. They will automatically shut down until they cool off, or until conditions are safe to operate. We also have included a reverse polarity protection...There is an integrated circuit on board that gives a current reading from the H-Brides to see how much current each individual motor is using. This gives you the option to write your sketches to react under certain loads, detect shorts and over heating states...We are creating a simple library that can be used to easily send commands to the Arc Controller. These commands can configure the Arc Controller to run a stepper motor, drive two brushed DC motors, and even an integrated an XY thumb stick “Arcade Drive”. The interface library will take input from you and transmit it to any number of connected Arc Controllers...We have had lots of success with tank style robots to the point that we made it run on two wheels until you want it to act like a tank. then it will lay down and drive like a tank. We have many theoretical uses, that we are eager to try such as: home made Segways, drive-by-wire go-karts, RC lawn mowers..."
There are a fair number of existing motor controllers for Arduinos if the Arc-Controller is overkill
for your needs. Here is a sampling of what's available for Arduino:
Adafruit motor shield V2
  1. Adafruit Motor Shield V2 for Arduino -- $19.95 -- "We kept the ability to drive up to 4 DC motors or 2 stepper motors, but added many improvements...Instead of a L293D darlington driver, we now have the TB6612 MOSFET driver: with 1.2A per channel and 3A peak current capability. It also has much lower voltage drops across the motor so you get more torque out of your batteries...Instead of using a latch and the Arduino's PWM pins, we have a fully-dedicated PWM driver chip onboard. This chip handles all the motor and speed controls over I2C...5 address-select pins means up to 32 stackable shields: that's 64 steppers or 128 DC motors!"
  2. Pololu Dual MC33926 Motor Driver Shield for Arduino -- $29.95 -- "This shield makes it easy to control two brushed DC motors with your Arduino or Arduino-compatible board. Its dual MC33926 motor drivers operate from 5 to 28 V and can deliver a continuous 3 A per motor. These great drivers also offer current-sense feedback and accept ultrasonic PWM frequencies for quieter operation."
  3. Ardumoto - Motor Driver Shield -- $24.95 -- "This is a motor shield for Arduino that will
    Ardumotor from SparkFun
    control two DC motors. Based on the L298 H-bridge, the Ardumoto can drive up to 2 amps per channel. The board takes its power from the same Vin line as the Arduino board, includes blue and yellow LEDs to indicate active direction, and all driver lines are diode protected from back EMF
    ."
  4. Monster Moto Shield -- $69.95 -- "This is essentially a ramped up version of our Ardumoto motor driver shield. For this monster shield we’ve replaced the L298 H-bridge with a pair of VNH2SP30 full-bridge motor drivers. We’ve also beefed up the support circuitry so this board is capable of driving a pair of high-current motors!"
  5. EasyDriver Stepper Motor Driver -- $14.95 -- "The EasyDriver is a simple to use stepper motor driver, compatible with anything that can output a digital 0 to 5V pulse (or 0 to 3.3V pulse if you solder SJ2 closed on the EasyDriver). EasyDriver requires a 7V to 20V supply to power the motor and can power any voltage of stepper motor."
If you use large motors or lots of motors on your MCU projects and could really use the Arc-Controller, you may want to head over to their Kickstarter page and support their campaign. If you know of other motor shields that do pretty much the same thing, send an email to arcatabob (at) gmail {dott} com and let me know what you use or recommend, and I'll update the post with that info.

**********

Thursday, August 21, 2014

mini Duino+ And Very-Small Arduino-Compatible Boards

So I read an article today about a new, very-small, Arduino-compatible MCU development board with a recently launched Kickstarter campaign. Tonight's post looks at this new board, called the mini Duino+, and the topic of other compact Arduino-compatible boards.
mini Duino+ and a US quarter

The mini Duino+ Kickstarter webpage introduces the new board this way:
"I started this project to solve a few problems with current small Arduino compatible boards. I wanted to create something that had more features and ability, but yet kept the cost down. This way a full-featured platform could be developed that doesn't break the bank. It could be small and affordable enough to leave in projects, and it needed to be completely open-source...The new advancement in Arduino compatible hardware utilizes the ATmega 1284P AVR, in place of the common 328p that is used in current Arduino hardware. The 1284P is the perfect mix of features, program space, and cost. Cheap enough to be used in almost every project; capable enough to deliver. No matter what you're trying to build, the Mini Duino+ packs the punch to do it and more."
I don't have enough experience with MCUs yet to explain what use cases would be highly well-suited for using mini Duino+. Maybe Ed or Nick or one of the other members of the Humboldt Microcontrollers Group can do that in a future post. But there was a Wired article, "Change of Pace: TinyDuino Microcontroller Is Smaller Than a Quarter," that had a good overview of
TinyDuino
very small Arduino-compatible boards, focusing primarily on the TinyDuino. That article discusses the origin of this teeny dev board.
"TinyDuino is a fully Arduino-compatible hardware platform, complete with expansion shields (add-on boards that have specific sensors or lights, for you non-robot designers). But where an Arduino Uno is around the size of a credit card, the TinyDuino is smaller than a quarter, and its sibling the TinyLily is the size of a dime. The TinyDuino line is designed around three core elements: size, affordability, and expandability. The idea, says Burns, is to open up Arduino to a whole host of applications that simply aren’t possible with the larger board. The seeds of TinyDuino were planted when Burns was working on creating smart sensors. The goal was sensors that would be plug and play, with on-board intelligence that allowed them to handle all the hard stuff, like reading data, calibration, and formatting the output."
The TinyDuino was launched with a Kickstarter in 2012 which raised over 10 times the original funding target of $10,000. The website for TinyDuino has an extensive list of available components for the board, with the board itself going for $20.95, and a basic TinyDuino kit going for $39.95.
Arduino Micro

Other very-small Arduino-compatible boards include, but are not limited to, two official Arduino ones, the Arduino Micro and the Arduino Nano, the SparkFun Pro Micro, the Digispark (for only $8.95) which also launched with a wildly successful Kickstarter campaign, getting over 60 times its original funding goal of $5000, and a whole host of Chinese very-small form factor knockoffs.

Because of limited space on these very small dev boards, they are usually more difficult for beginners to use than an Arduino Uno board. And since these boards are intended to be prototyping boards, you may want to build your prototype on a normal size board like the Uno before reproducing your successful circuit
Digispark development board
design on one of these smaller boards. And at some point you'll be able to go straight from prototyping with the Arduino Uno to using the desired MCU on a custom made PCB (printed circuit board), using only the components necessary which will often result in a much smaller board than the Uno.

At one of the upcoming Humboldt Microcontrollers Group meetings, I'm going to ask everyone who comes to the meeting to bring smaller MCU development boards they have, and we can discuss the pros and cons and what projects they've used the small form factor boards on.

**********

Wednesday, August 20, 2014

Samsung Smart Bike: MCUs For Your Bike

Bikes present a wide range of opportunities to use microcontrollers to improve your riding or at least give you a new experience. This posts briefly looks at a few of those opportunities.
Samsung Smart Bike

Tonight's collection of bike related MCU projects and ideas was prompted by reading "Samsung Smart Bike packs an Arduino and frickin’ laser beams," a June 12 post in Geek.com. Geek's post said:
"Samsung’s been working on a concept bike in conjunction with Maestros Academy...For the smart bike in particular, the design team wanted to help reduce the number of cyclists involved in accidents each year...Front and center (literally) on the bike is a magnetic smartphone mount. Slap on your Galaxy phone and fire up the app to control the bike’s systems. There’s onboard LED lighting for nighttime riding and a rearview camera so you can safely keep tabs on traffic as it approaches from behind — video is streamed to your bike-mounted phone. And then there’s the four bike-mounted lasers. The lasers on Samsung’s bike aren’t designed to take out incoming foes...They’re part of the bike’s safety system. Fire them up, and a virtual bike lane gets projected onto the roadway to make sure motorists give you enough room to
ride...How does the bike communicate with your phone? It’s hiding the maker’s secret weapon, an Arduino, which gets paired via Bluetooth. The Samsung app also
Laser bike lane concept
does the typical social fitness stuff. You can track your rides and share them with other smart bike users, see where other people are riding, and even keep tabs on how many people are riding the same path as you in real time
."
The Samsung Smart Bike is just one type of MCU-bike project. Using MCUs on bikes can be divided into five categories:
  1. MCUs improving biking experience but not connected to the bike
  2. Bike-connected MCUs for independent projects
  3. MCUs integrating multiple biking features
  4. MCUs connected to bike and to smartphone
  5. MCU-controlled e-bikes
Numerous MCU posts could be written about each of the above categories of bike-mcu combos. For tonight's post we'll just briefly descibe each category and mention related projects or webpage links.
Flora brake light backpack

The first category, bike-related MCUs which aren't bike-connected, covers items like this Arduino blinking bike patch backpack, this Flora brake light backpack or this jacket which uses an Arduino to light up an arrow or other rider-visibility features. The MCU in these projects aren't actually connected to the bike or integrated into its functioning, but they do create a better riding experience.

The second category, bike-connected MCUs for independent projects covers items like the bike speedometer from Instructables or some of the Arduino-bike projects from the Intro to
Bike speedometer
Arduino Pimp My Bike series
. To find a specific bike-mcu project you're interested in, just Google for  bike Arduino [or microcontroller] xxxxx, where xxxxx is the topic or type of bike feature or function in which you are interested.

MCUs integrating multiple biking features includes projects like this bike dashboard Instructables which integrates a lighting system and a speedometer. An Arduino or other MCU system can control a wide variety of sensors and outputs, so you could include front and back-illuminating LEDs or lasers, blinking LEDs for turn indication, photosensors to automatically turn on your bike lights and lots of other physical computing features that are functional, cool or both.
Bike dashboard

The fourth category, MCUs connected to the bike and a smartphone have a huge upside for innovation and benefit in the next five to ten years as smartphones add sensors and computing power and as MCUs continue to become more powerful. This category includes projects like the Samsung Smart Bike. The MCU controls and communicates with a wide variety of devices and sensors, and the smartphone can easily connect your bike with the internet and with your friends or other bikers.

MCU-controlled e-bikes represents the largest financial impact of MCUs on biking to-date. China has been a huge market for e-bikes because of the size of the population, the low cost transportation provided by e-bikes and the effort to reduce or minimize pollution caused by gas or diesel vehicle engines. Here are two e-bike overview PDFs; a Samsung application note "Electric Bike Controller System" and a Texas Instruments application report "Hardware Design Considerations for an Electric Bicycle Using a BLDC Motor."

What type of MCU-bike project would you like to work on with the Humboldt Microcontrollers Group? Come to the next meeting, tomorrow night, Thursday, August 21, at 1385 8th Street, Arcata, California, and discuss that project with the MCU group.

**********

Tuesday, August 19, 2014

An I/O Source For Platforms That Don’t Have One

[Today's post is by Nick Appelmans, a member of the Humboldt Microcontrollers Group]

Many times I comment that we have more processing power in our phones than the astronauts who traveled to the moon had at their disposal. Often, I follow this up with some derogatory remark about how little we actually use this capability. One area that stands out is controlling physical devices or “physical computing.” I hope this review will inspire you to tap into the resources that sit idle in your pocket and help you to move away from pixel pushing and into the exciting world of input/output.
IOIO board

This blog has previously featured a story on a Kickstarter that produces a device that turns your Android phone into a robot controller. Back in 2011, this feat was accomplished by Ytai Ben-Tsvi, a Google developer, and coworkers working on their 20% time to bring input/output to an Android device using open source hardware and firmware. The IOIO (pronounced “yoyo”) was born and SparkFun picked it up helping to troubleshoot, design the PCB and deal with production. Subsequently in early 2013, a second version was developed, the IOIO OTG (on the go), and several companies help to produce and distribute it (still using open source and selling for $30). The “on the go” designation is more than just a marketing ploy but refers to the fact that the board can now act as a USB device as well as a USB host (more on this later). To date, there is a robust community of developers with an impressive list of completed projects (as of this publication, 181 pins on Pinterest). In this post, I’d like to cover some of the features and describe the process of developing an Android application. Finally, I’ll share some favorite projects that I discovered.
IOIO connected to Android smartphone

The heart of the IOIO is a PIC24F which has lots of ports to provide I/O pins of various flavors (46 in total) operating at 3.3V logic. About half of these pins can be run in ‘open drain’ configuration allowing 5V logic to be implemented or to be used in a bus. These pins can source or sink maximally 20 mA of current and aren't meant to drive motors but only to connect to a driver circuit with power provided by an additional source. Sixteen pins can be used for analog input (0 - 3.3V) with a relatively low sample rate (1KHz). However, the MCU can support 500KHz total for all pins and for the enterprising firmware coder, this could be changed (Ytai expressed an interest to improve sample rate for those wishing to work with audio signals in his blog yet I couldn't find that this has been accomplished). Incidentally, Ytai has done a remarkable job of responding to blog comments and forum questions and this as well as the great design features have contributed to forming the robust community at the ioio-users google group. For more information on the specs of these pins and the board in general, check out the wiki here. So, by connecting these pins to various sensors a whole lot of information can be processed by the Android app.
Self-balancing IOIO robot

How do you develop an Android app to control the IOIO? Well, as I said earlier the OTG aspect of the IOIO OTG means that the board can act as a USB host and the Android phone or tablet as the USB device or the other way around for cases where developers want to control I/O ports with a PC. Those wishing to take advantage of PC control of IOIO should look at the wiki info on that topic here.

Android development requires setting up a Java programming environment as described here and including the appropriate SDK for the device you will program for. This is a weak link for folks just starting to develop in Android as there is no clear hand-holding tutorial going from A to Z and the closest one is found on the SparkFun site here which doesn't detail setting up for the current configuration of the IOIO OTG. This version uses Android Open Accessory in lieu of Android Debug Bridge. See the wiki here to use AOA IOIOLibAccessory instead of the IOIOLib that the SparkFun tutorial recommends. This link also covers setting up your AndroidManifest.xml too. It’s time to move on to writing code for the IOIO once you've got your HelloAndroid app running on your phone or tablet. Uploading the HelloIOIO took me a while to straighten out the various file links, and AOA vs ADB approaches.
IOIO cellular wall printer

What’s been done with the IOIO board that caught my attention? Well, since I mentioned the Android robot blog post, I’d be remiss for not including a link to a simple balancing robot here. Here’s a nice surveillance robot. I’m most excited for art that you can control with the IOIO; here’s a link for an android controlled pixel board. I’m picturing a gigantic mural that android users could connect to and create a communal dynamic art piece. Another project is wearable tech; you could easily use a phone to control the color of your outfit like this color picker. If you've ever wanted to write giant messages on your wall from your phone, this cellular wall printer is a great way to do that using the IOIO. And my personal favorite, the ioio breathalyzer.

That’s it. I hope that you are motivated to check out the great work that Ytai and colleagues have accomplished and that you might even consider incorporating the IOIO into your next project.

**********

Monday, August 18, 2014

Makeblock -- YAAR!!

No, Makeblock is not a pirate microcontroller -- it's yet another Arduino robot.
Makeblock Gold starter kit

The August 13 Tech In Asia article "This Chinese startup lets kids easily make and program their own robots" is sort of an update of one of the Arduino robot companies that's been around for a while. They're a Shenzhen company that did a very successful Kickstarter, ending up with over six times their original $30,000 funding goal. According to the Tech In Asia article:
"...Makeblock, a startup from Shenzhen, offers a cheaper, more practical approach. The company sells robotics kits for as little as US$120 and enterprise kits for up to US$500. Makeblock makes 200 different mechanical parts and growing, which can be programmed using either Arduino or Scratch – the latter is an MIT-developed drag-and-drop programming environment for kids to learn the fundamentals of coding. CEO Jasen Wang says kids can easily make their own toy robots, while more serious hobbyists and even professionals can create robots to be used for more practical applications. Once a robot is built, it can be controlled via mobile app..."
A Wired article from 2012 titled "Robotics Hacker Erects Open Source ‘Lego for Adults’" gives some of the backstory about Makeblock:
"Jasen Wang once bought a home robotics kit. He had studied aircraft design in college and spent years at an electrics engineering outfit, but he still found the instructions completely incomprehensible. And the pieces were flimsy. And after he broke two of them, he gave up entirely. The good news is that he resolved to create his own robotics kit that was actually worthy of the name. The result is Makeblock, a set of flexible components — including slots, wheels, timing belts, and motors — for building robotics...You can even integrate these components with Lego blocks, as well as open source Arduino circuit boards and various other motors and standard industrial parts. And all of Makeblock’s schematics are open source, meaning anyone can build compatible parts or try to improve upon the designs...the company has built a custom-designed servo because Wangs says the ones already on the market weren’t adequate for robotics. And he’s not entirely happy with the existing integration system, so the company is building a new electronic platform that uses modular, color-coded connectors to make it easier to attach circuit boards and sensors...The key to Makeblock’s combination of sturdiness and flexibility are the threaded slots made from aluminum. Wang hit upon the idea at his day job. Although he knew he wanted to build a better robotics kit, he had no idea how. One day, he was asked to learn more more about the production side of the business, so he was sent to the factory to be trained in assembly work. It was here that he came across an aluminum part with a threaded slot, enabling engineers to add screws or connectors anywhere on each piece."
A more recent 2013 article from Make magazine gives Makeblock kudos for the high quality
High quality aluminum parts
parts.
"Compared to t-slot aluminum beams, Makeblock is much more sophisticated. It has threaded grooves running along the length of the beams, bolt holes running parallel to the grooves, as well as threaded holes on the ends of the beams. You can really get a sense of these features in the photo to the right. While the beams are great, Makeblock has created an impressive array of additional parts. The wheels and treads are extremely robust. There’s a nice variety of connector plates."
The electronics kit for Arduino and Scratch is $99 and looks like a pretty good package (it's just the electronics).
Electronics kit for Scratch and Arduino

It looks like Makeblock would be an excellent starting point for a person who wants to just build a robust robot and doesn't feel the need to cut and shape every part by hand. I don't think you have to worry about your Makeblock robot falling apart because you didn't cut components to just the right dimensions or weren't an expert with a CNC router or a laser cutter.

Maybe I'll ask for a Makeblock kit for Christmas!

**********

Sunday, August 17, 2014

Make Your Arduino Go Fast: A Modern Go-kart

Electric Arduino Go-kart (from Instructables)
As the Hackaday post "Electric Go-Cart Has Arduino Brains" says, most modern vehicles have lots of their functions controlled by computers (or microcontrollers / MCUs). The 2014 go-kart that's the subject of this post is truly a modern vehicle in that respect.

And...the go-kart will make your Arduino go pretty fast. In MPH, not GHz.

I first saw this go-kart mentioned on Google News in the Unocero article "Un Go-Cart eléctrico que usa Arduino," so if your native language is Spanish, you may want to read that version of this tech story. Google News is nice that way, because sometimes I see a non-English article that lets me know about a story I'd not have read if it wasn't in English. Google Translate certainly is not perfect or even almost perfect, but it usually gives a usable version of the article, and you can do more Googling based on the Skynet-translated version of a non-native language article.
Steering wheel showing LCD screen (from Instructables)

It appears the source of the story about this Kartduino is the "Electric Arduino Go-kart" Instructable done by a 15-year old from California. The Instructables write-up presents some of the technology used to build the go-kart, but it cautions the reader that it's not a complete guide to building the vehicle. Here's a taste of the write-up:
"The drive setup uses a Hobbywing Xerun 150A brushless electronic speed controller to control a Savox BSM5065 450Kv motor. Batteries are 3x zippy lithium polymer - 5 cells, 5000mah. The motor has two large fans I pulled out of an old computer for cooling, mounted right over the motor. The chain drive is a 1:10 overall ratio, using a 15 tooth on the motor chained to a 30 tooth on the jackshaft, and a 9 tooth from the jackshaft to a 45 tooth on the wheel. The tires are 10" diameter so at 20 volts the top speed is around 30 mph. The ESC is controlled via PWM from the arduino. A throttle potentiometer on the steering wheel controls this. Constant current is around 40-50A, and the batteries last around 30 minutes with an average speed of 10-15mph. It requires a small push to get started (really, the motor just has to be rotating) and accelerates extremely fast...This uses a sensorless brushless motor. They are not capable of starting under load. It may need a quick push before it can start. Don't try to start them under load. I already had one motor burn out because it stalled and the current burnt the coils' insulation. Sensored motors overcome this problem."
I'm sure if the Humboldt Microcontrollers Group ever wanted to build a similar 'kartduino,' Ed and others in the group would have plenty of ideas and knowledge on how to improve the design, with 'sensored' motors or an alternate solution to the sensorless brushless motors that burned out on the design shown in the Instructables.
Go-kart's wooden electronics control box (from Instructables)

With regards to the MCU in this zippy little go-kart, the Hackaday post covers the different parts of the vehicle integrated with the Arduino.
"In addition to the throttle control, the Arduino is also responsible for other operational aspects of the vehicle. There are a bunch of LED lights that serve as headlights, tail lights, turn signals, brake lights and even one for a backup light. You may be wondering why an Arduino should be used to control something as simple as brake or headlights. [InverseCube] has programmed in some logic in the code that keeps the break lights on if the ESC brake function is enabled, if the throttle is below neutral or if the ESC enable switch is off. The headlights have 3 brightnesses, all controlled via PWM signal provided by the microcontroller. There is also an LCD display mounted to the center of the steering wheel. This too is controlled by the Arduino and displays the throttle value, status of the lights and the voltage of the battery."
An interesting alternative kartduino I ran across whilst doing research for this post is the
LOLrioKart (by MIT student)
LOLrioKart (see picture at left). This slightly-strange vehicle was created from a shopping cart by a Massachusetts Institute of Technology student. Might be handy for going on a quick trip to Wildberries or the Co-op for groceries.

Speaking of modern vehicles and the increasingly important roles played by MCUs in vehicles, maybe Ford, another vehicle manufacturer, a microcontroller manufacturer or an electronics distributor will in the future want to sponsor a Humboldt Microcontrollers Group project to design and build a modified version of Steve Salzman's vehicle, with upgrades that allow it to parallel park itself as well as generate and track all sorts of vehicle operation data. That will be a fun project!

**********

Saturday, August 16, 2014

Using Arduino For Mind Control

This isn't a post about using a microcontroller (MCU) to control someone's mind -- it's a post about how to use an Arduino device that lets you use your brainwaves to manipulate inanimate objects.
OpenBCI prototype called "Frankenboard"

Here's how the August 11 article "Building Mind-Controlled Gadgets Just Got Easier" from IEEE.org explains this new brain-computer interface (BCI).
"Their system enables DIYers to use brain waves to control anything they can hack—a video game, a robot, you name it. “It feels like there’s going to be a surge,” says Russomanno. “The floodgates are about to open.” And since their technology is open source, the creators hope hackers will also help improve the BCI itself. Their OpenBCI system makes sense of an electroencephalograph (EEG), signal, a general measure of electrical activity in the brain captured via electrodes on the scalp. The fundamental hardware component is a relatively new chip from Texas Instruments, which takes in analog data from up to eight electrodes and converts it to a digital signal. Russomanno and Murphy used the chip and an Arduino board to create OpenBCI, which essentially amplifies the brain signal and sends it via Bluetooth to a computer for processing."
Current OpenBCI board
One nice aspect of Arduino is that it's getting more and more people who aren't electronics experts, computer programmers or engineers involved with physical computing. The IEEE article says they are "artists who met at Parsons the New School for Design." In the Humboldt Microcontrollers Group, there is a forester, a biologist, and an artist. And we'd love to have more non-engineers and others whose main experience and training is not in the field of electronics. The Arduino movement seems to encourage a whole new spectrum of people to see how they can apply MCUs and other modern electronics to their particular field of interest.

I haven't quite figured out if I think OpenBCI will be around for the foreseeable future. They seem relatively legitimate, but their website appears to be either very new or not a high priority for the founders of OpenBCI. Quite a few of the webpages on the site say 'Under Construction.' Even the 'Getting Started' page says it's under construction. But IEEE is a pretty reputable organization, and I don't think they'd have published the article if they weren't comfortable that the project was legitimate. Overall, though, it appears you'll get the OpenBCI hardware if you want to spend the $399 on either the 8-bit or 32-bit board kits. They also have a GitHub site that contains "the core OpenBCI hardware and software frameworks."

In addition to the IEEE August 2014 article about OpenBCI, there were a number of articles in early 2014 when OpenBCI did a successful Kickstarter campaign, getting more than twice their original goal of $100,000. Wired did an article in January 2014 titled, "These Guys Are Creating a Brain Scanner You Can Print Out at Home." The article featured a 3D printed 'brain scanner' headset that they called the Spider Claw 3000. Here's the article's description of the brain scanner:
"Spider Claw 3000" 3D printed 'brain scanner'
"It includes sensors and a mini-computer that plugs into sensors on a black skull-grabbing piece of plastic called the “Spider Claw 3000,” which you print out on a 3-D printer. Put it all together, and it operates as a low-cost electroencephalography (EEG) brainwave scanner that connects to your PC...You can target up to 64 locations on the scalp with a maximum of 16 electrodes at a time."
The $399 starting price for the OpenBCI is too steep for my budget, but I'm sure there will be some pretty interesting developments with this equipment in the next few years. The IEEE article mentions three projects:
"Audette, the engineer from Creare, is already hacking robotic “battle spiders” that are typically steered by remote control. Audette used an OpenBCI prototype to identify three distinct brain-wave patterns that he can reproduce at will, and he sent those signals to a battle spider to command it to turn left or right or to walk straight ahead. “The first time you get something to move with your brain, the satisfaction is pretty amazing,” Audette says...In Los Angeles, a group is using another prototype to give a paralyzed graffiti artist the ability to practice his craft
Chip Audette and brain-controlled Hex Bug battle spider (from IEEE)
again. The artist, Tempt One, was diagnosed with Lou Gehrig’s disease in 2003 and gradually progressed to the nightmarish “locked in” state. By 2010 he couldn’t move or speak and lay inert in a hospital bed—but with unimpaired consciousness, intellect, and creativity trapped inside his skull...They’re using OpenBCI to record the artist’s brain waves and are devising ways to use those brain waves to control the computer cursor so Tempt can sketch his designs on the screen...David Putrino, director of telemedicine and virtual rehabilitation at the Burke Rehabilitation Center, in White Plains, N.Y., says he’s comparing the open-source system to the $60,000 clinic-grade EEG devices he typically works with...Putrino hopes to use OpenBCI to build a low-cost EEG system that patients can take home from the hospital, and he imagines a host of applications. Stroke patients, for example, could use it to determine when their brains are most receptive to physical therapy, and Parkinson’s patients could use it to find the optimal time to take their medications
."
I wonder what some imaginative teenagers who have a lot of time and energy on their hands will come up when they start hacking OpenBCI...

**********

Friday, August 15, 2014

NASA Spaceship And Mission Control Desk

Spaceship in bedroom
You have to watch this video of a homemade NASA spaceship and Mission Control desk, part of which is controlled by an Arduino.

The above video is featured in the June 26 "Making Fun: Kid’s Room Spacecraft" post on the Make magazine website. The Mission Control desk featured in the above video and Make post was highlighted in a February 19 Make post, "Making Fun: Mission Control Desk," and was explained in this video. If you liked the video and are interested in details of how Jeff built some of the parts, make sure to read the two posts linked above.

After watching that spaceship video, I was both inspired and embarrassed. Inspired by the awesome job Jeff Highsmith did of building the Mission Control desk for his sons, then later building a NASA spaceship that's linked to the Mission Control desk.
Control panel in spaceship

As someone interested in learning about microcontrollers (MCUs) and about building things with MCUs, I was very much inspired by the variety of switches, lights, controls and realistic panels on the amazing desk and spaceship that Jeff built for his sons. As an engineer I was also inspired when he said in the video, "I put in an iPhone dock for future expansion. For now it will just play video from NASA, but in the future I plan to have some homemade satellites to monitor." I don't know if he meant homemade satellites that hang from the ceiling of his son's room, or if he is figuring that in a few years, there will be civilian satellites and he plans to have one or several of those civilian satellites be his. Either way I'm sure his expanded system will be cool, and his sons will have a great time with
Mission Control desk
the desk, the spaceship, the satellites and other additions Jeff and the boys make to their private space program. Can you imagine how much those two boys are going to know about electronics and building stuff by the time they reach high school!

Now to the embarrassing aspect of the Highsmith Space Program. I'm a bit embarrassed I never made anything half as cool as that for my kids. I'm also a bit embarrassed that the Humboldt Microcontrollers Group hasn't come up with a really unique and interesting project that four or more people want to put a bunch of knowledge and skill into that will make people who see it say, "Whoa, that's really awesome!"

There are a couple things that I want to do a little differently as a result of watching Jeff Highsmith's videos and reading his Make magazine posts about the Mission Control desk and the spaceship.
Payload bay remote camera monitor

The first thing to do differently with MCU projects is to 'think big while paying attention to details.' Jeff appears to have had a 'big picture' idea of what he wanted for his sons -- starting with a homework desk that can convert into a NASA Mission Control desk, then extending the space theme to his other son's bedroom with a spaceship. But what makes the desk and spaceship fantastic accomplishments is the close attention to the details. The control panels have complex and extremely realistic looking labels, switches, lights and controls. To make the experience authentic for his kids, Jeff incorporated recordings from NASA and simulations of actual astronaut problems. I realize the only way to tackle a large project is to break it down into small steps, but you have to have a good picture of what the large project will look like, and you have to pay attention to the small steps. When you know the big picture, and you're taking care of details, then commitment and perseverance have to kick in.

Mission status light panel
So, for the Humboldt Laser Harp and the Electronic Light Orchestra, the Humboldt Microcontrollers Group should discuss, agree on and document what the big picture is. How much time and effort do people want to put into that project. Next we should get more specific, more detailed on the finer points of what we'd like the Humboldt Laser Harp to look like and to do from both a music and a lighting standpoint.

The second thing to do differently on MCU projects is taking more photos and videos at each stage of a project, planning ahead of time the shots to capture for each project. Jeff's videos have excellent documentation of building the desk and spaceship. I became less embarrassed but no less inspired when I read that Jeff is a full-time videographer. That explains thinking things out enough ahead of time that he captured cool construction sequences while he was building the projects. It would be really good if the Humboldt MCU group could find a videographer or two who are interested in MCUs and electronics and would like to participate in the group's activities. They would know how to capture the story of a project, and they'd be able to put together a cohesive and impressive video.
Ardunio used to control instrument panel

I think I'll keep a link to Jeff's spaceship video handy and watch that regularly to keep me inspired and to remind me of how rewarding completion of a big, complex project can be.

**********