Saturday, May 31, 2014

TI LaunchPad Microcontroller

At the May 29 meeting of the Humboldt Microcontrollers Group, Ed and Nick were discussing the Texas Instruments (TI) LaunchPad microcontroller (MCU).

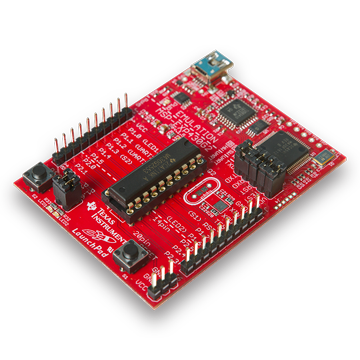
This MCU was also in a few news articles recently, so I decided to do a little research on this item and see if it's something worth buying for future electronics projects or experimentation.

Automation recently had an article titled "Prototype Internet Of Things Apps for $20?" This article states:
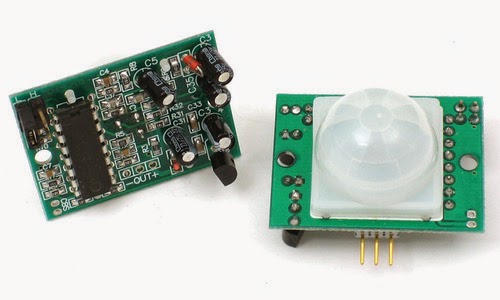
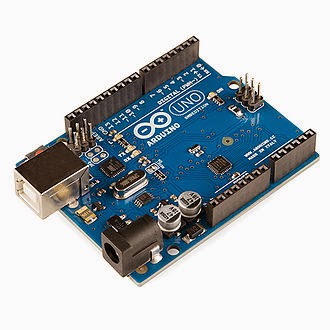
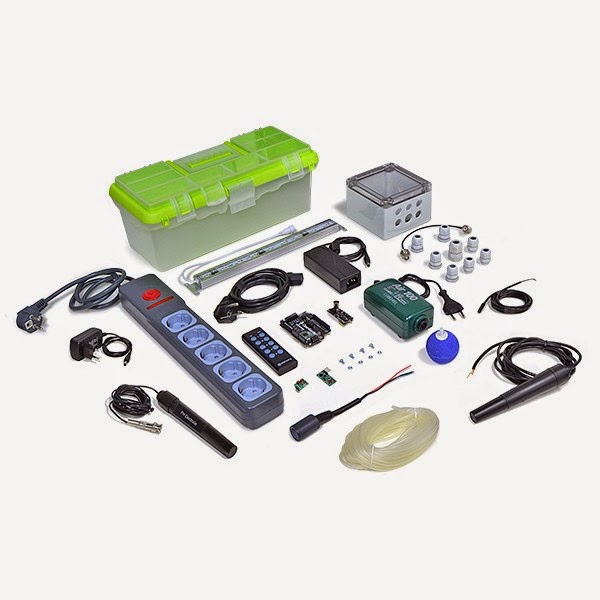
"...Texas Instruments has released it newest LaunchPad microcontroller—the Tiva C Series Connected LaunchPad. According to Texas Instruments, this MCU enables engineers to prototype a range of cloud-enabled applications, bringing expansive connectivity to any new or existing LaunchPad-based application. And it retails for $19.99. The peripherals on this MCU platform can reportedly run multiple communication stacks simultaneously, allowing engineers to develop network gateways that can connect multiple endpoints to the cloud.  Example applications include sensor gateways, industrial communication/control networks and cloud-enabled devices, as well as home automation controllers..."
At $20, the above mentioned version of the TI LaunchPad is about $10 less expensive than an Arduino Uno. And the LaunchPad MSP-EXP430G2 is only $10. Because I'm very early in the learning stages of how to use MCUs and what the various features are used for, I don't yet know how to compare the TI LaunchPad to the Arduino Uno or to the many other MCUs available from DigiKey or one of the other electronic component vendors.

A May 30 article titled "Texas Instruments do-it-yourselfers show off creations at annual event" talks about a few DIY projects TI employees have done with their microcontrollers:
"...Fernandez recently created an LED light system that turns his kitchen into “a European nightclub.” He attached an LED light strip to his kitchen cabinets, programmed it using a TI microcontroller developer kit called LaunchPad and sends Twitter hashtag messages to change the color...TI test engineer Luis Flores uses a smartphone to scroll LED light images or text across sunglasses. He used TI microcontrollers, a Blue Tooth interface and a microphone. Zwerg created his low-water, switch-controlled outdoor shower with a 12-volt battery and a microcontroller. He takes it every year to the Burning Man festival in the Nevada desert...Leonardo Estevez, a researcher at TI’s Kilby Labs who has been making beer for 20 years, wanted to create a better brewing process. So, he developed a smartphone-controlled microbrewery kit based on a TI LaunchPad. Is the beer any good? “The neighbors have never complained,” Estevez said..."
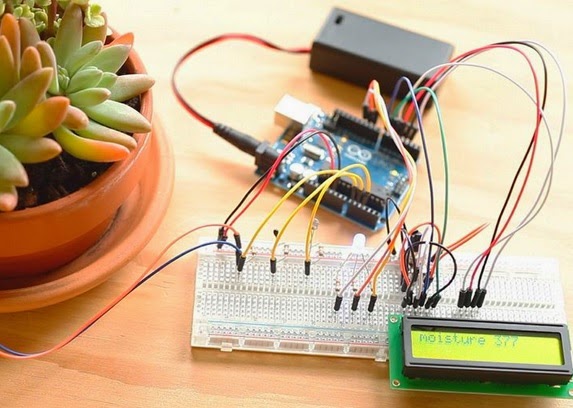
I'll do some more research tomorrow and also ask Nick and Ed if they'll consider collaborating on a blog post about the specific advantages of the LaunchPad vs other MCUs.

**********

Friday, May 30, 2014

Microcontrollers In Grades 7 - 12

A recent TechCrunch post highlights what the Humboldt Microcontrollers Group (HMG) can help bring to the middle school and high school students of Humboldt County.

The post, titled "These Kids Are 3D-Printing Their Education," explains that:
"A group of junior high and high school students in Cambridge, Mass., are part of an experimental education program that aims to prove they’re capable of solving real-world problems early with the help of 3D printers, Arduino and group collaboration. Co-founders Saeed Arida, David Wang and Saba Ghole started NuVu Studio as a way to apply their dissertation theory, which claims that kids as young as 13 are capable of working on design and engineering projects normally reserved for those at the master’s level. By the looks of several projects involving medical devices, a game that helps you lose weight and a modular telepresence robot you can control from far away, the theory seems to be correct...The program does more than just teach kids 3D printing, design and engineering principles, although Arida admits there’s probably not a single project that doesn’t incorporate the use of Arduino at some point..."
It would be fun to help Humboldt 7th - 12th grade students get involved with microcontroller projects that many college students don't get the chance to work on in school. After the HMG has more experience helping beginners learn the basics of Arduino, we should contact local schools to see if there's interest in collaborating on student microcontroller workshops or projects.

**********

Thursday, May 29, 2014

May 29 -- Second Meeting of Humboldt Microcontrollers Group

Short post tonight -- just got home from the second meeting of the Humboldt Microcontrollers Group because it ran long. Which is a good thing, since people wouldn't have hung around past the nominal 8 PM meeting end time unless they were enjoying themselves.

We only had four people for most of tonight's meeting, which is about half the size of the first meeting. We hope the low participation in tonight's gathering was because the other people from the first meeting just couldn't make it to tonight's meeting but are still interested and will be at future meetings.

About 2/3 of the way through the meeting, another person joined the group. He first had to find
someone to let him in the building because the doors to the Greenway Building were all locked. The front door had been propped open with a wooden wedge and the meeting information posted on the laminated sign on the front door saying to keep it open until 8 PM. Unfortunately either someone accidentally kicked the wedge out of the way or closed the door on purpose before 8 PM, because a couple people were unable to join the meeting because the door was locked.

I apologize to anyone who attempted to come to the meeting tonight and was locked out. To address the issue of the front door being automatically locked after 5:30 PM, for the next meeting (on June 12) we will:

  1. Put the wedge in the door to hold it open and write the meeting info on the laminated sign.
  2. Check on the door at 6:30 and 7:00 PM to make sure it's still open.
  3. Put a Humboldt Microcontrollers Group meeting sign on the front door with a phone number of someone in the meeting to call if the door is locked.
We also might meet down in the front lobby area at the big round table. That way we can see the front door and know if it gets closed during the meeting.

We talked about a wide range of subjects in tonight's meeting, but the two primary microcontroller topics were CapSense and IR sensors for motion detectors. I'll write more about those two tomorrow -- too late tonight for technical topics.

For the June 12 meeting of the group, we'll be focusing on the #5 Blum video tutorial, which covers motors and transistors. If there are people new to microcontrollers at the meeting, a group will split off into a separate area to talk about the first Jeremy Blum 'Basics of Arduino' videos. The more experienced people will cover breadboarding or other work they did on the topic of motors and transistors, as well as any specific exercises or questions they had from the #5 video.

Hope to see lots more people at the June 12 meeting, including anyone who was inadvertently locked out tonight...

**********

Wednesday, May 28, 2014

Electronic Components & Start #3 Video Tutorial

Yesterday I ordered the rest of electronic components to be able to do the first five Jeremy Blum 'Arduino Basics' video tutorials (I hope), and the multimeter and soldering iron arrived from Adafruit. Today the sensor package from SparkFun arrived, and tonight I started the #3 Blum video tutorial.

I've got most of the components needed for the Blum video tutorials, but I didn't have everything needed for the #3 video. I just watched the video and reviewed the electronics formulas that Jeremy explained and did the parts of the exercises that I could. As soon as the final order of components arrive, I'll be able to complete the #3 video.

After I finish the first five video tutorials, I'm going to review all the exercises to make sure I understand all the component breadboard circuits I hooked up and all the programs I wrote. Up to this point, I understand some of what I've done, but other parts of the exercises have just been copying exactly what Jeremy does in the videos, rather than understanding and being able to do it without any instructions. I'll update the wiki with the component information I'm figuring out, with links to helpful resources and with the beginning programming concepts that are used in the exercises.

Speaking of the wiki, I found out that Wikispaces no longer gives unlimited accounts on their free wikis. You can now only have 5 accounts on a wiki unless you pay. Ed graciously offered to host the Humboldt Microcontrollers Group wiki on his server, so after he gets it set up, we'll start moving content over to his wiki. We'll be using MediaWiki because that's the easiest one to get rolling on his server, and it's a pretty familiar format because most people are familiar with Wikipedia, which uses MediaWiki.

Tomorrow night, May 29, is the second meeting of the Humboldt Microcontrollers Group. We'll be meeting from 6 to 8 PM at 1385 8th Street in Arcata, California, USA. People interested in microcontrollers or Arduinos are invited to join us -- the event is free, you don't have to know how to program microcontrollers, and there's no need to be a member of anything to participate.

We'll meet first with everyone to discuss stuff everyone should hear or be involved in. Then we'll split into two groups -- the beginners who are interested in learning about microcontrollers, and the people with previous microcontroller experience who want to do MCU projects and learn or share microcontroller tricks that not everyone knows.

Looking forward to seeing you tomorrow at 6 PM!


**********

Tuesday, May 27, 2014

Microcontrollers & Libraries: More Than Just Reading About MCUs

Libraries are places where people in a community go for information.

Some libraries are starting to provide more information about microcontrollers (MCUs) than just books for you to check out and take home with you to read. Around the USA, libraries in cities large and small are starting to offer hands on classes that involve working with MCUs, most often Arduinos.

Doing a search on Google News for libraries currently offering classes or workshop activities involving MCUs turned up eight libraries who recently had an article or a blurb about those MCU activities. The Allen County Public Library in Fort Wayne, IN, has 'maker spaces' at two of its libraries and the May 25 article about them mentioned an Arduino class, as well as two robotics classes and a circuit board class that likely involve MCUs. The Allen County Public Library got involved with MCUs and the maker movement with a mobile 'maker space' a few years ago:
"The library has also had a partnership with TekVenture, a non-profit Fort Wayne company. TekVenture’s Maker Station mobile laboratory was moved to the library’s lot at Washington and Webster streets three years ago, where the staff provided laboratories and workshops for library employees and patrons. Georgetown is still in the process of growing a crop of makers, Georgetown Branch Manager Lisa Armato said. “Thus far, people are mostly just taking classes and then afterward some come to practice...Another boy, who was an avid gamer, designed and made 3-D copies of a device that attached to a smart phone and to free up the player’s fingers for easier game playing on the phone’s screen. “He printed off his design for $3, took them to school and sold them to his gaming friends for $10,” Gregg said...“Everyone is very excited about all the new learning opportunities,” Armato said. “All of our classes are filling up, and we have waiting lists for some. We are seeing all ages, from 9-year-olds to senior citizens, learning side by side,” she said."
Other libraries have smaller budgets or are just starting to get involved with MCUs via introductory classes. Two libraries currently in the news who are also offering Arduino classes are the Westport Library in Connecticut and the Mead Public Library in Sheboygan, Wisconsin. The May 15 article about the Westport Library says:
"A workshop on how to use the Arduino board, a small programmable microcontroller board, will be taught in a six-session workshop at the Westport Library...The Arduino board is an open-source electronics platform used for robotics, and all kinds of other projects...The sessions are for anyone with an interest in electronic circuits and the ability to learn coding. Each session will focus on a new problem...participants who have an Arduino kit should bring it. There will also be kits for use provided by the library. The workshop will be using the Sparkfun Inventor's Kit for the class, which is available at for purchase..."
The May 19 Sheboygan article says:
"“Wanna race?” 14-year-old Christian Henke asked as he elbowed his dad, Andreas, at the Mead Public Library on Saturday. The father and son had just sat down to try their hand at building their own self-driving robot car at the Sheboygan Connects activity day at the library...The simple robotic vehicle, which Christian and father worked on, had two large wheels and a rear caster. At the front of a robot, two sensors turned 180 degrees on a servo to determine which course was the least obstructed...The robot was controlled by an Arduino circuit board, a simple programmable electronic prototyping platform..."
The first step towards having libraries offer classes with Arduino or other MCUs is for local makers to talk to their librarians and offer to explain more about the small computing components and why the library might want to consider offering some classes or workshops with them (often with the local makers developing and leading the classes or workshops).

**********

Monday, May 26, 2014

Finished #2 'Arduino Basics' Video Tutorial

So tonight I finished the #2 Jeremy Blum video tutorial on 'Arduino Basics.'

I was hoping to finish both #2 and #3 videos this weekend, but life interrupted and the best I could do was to finish the #2 video. Connecting the components for each of the exercises in the videos then writing or modifying the sketches (Arduino programs) per Jeremy's instructions isn't hard, generally speaking. But it does give a small sense of satisfaction just to watch the LED blink correctly or for the LED to brighten as you press the switch. Baby steps. With a lot more
components, a lot longer and more complicated sketch, and probably longer debugging time, when I upload the 'make the robot walk' sketch and hit the run switch, I'll have the satisfaction of seeing the robot walk across the room! Or the Halloween decoration light up and emit scary sounds. Or the garden sensors check the soil moisture to let me know if the tomatoes need to be watered.

The screws I complained about yesterday for attaching the Arduino to the wooden base -- apparently they weren't missing. What was missing was my understanding that when the instructions said 'screws,' they were referring to what I think of as bolts. So now the Arduino Uno is attached to the wooden base. With screws and nuts.

Also had a chance today to find all the components online that I need to finish ordering for the first five 'Arduino Basics' video tutorials. I'll place the order for those tomorrow. The parts ordered last week from Adafruit and SparkFun should arrive sometime this week.

**********

Sunday, May 25, 2014

Working On Blum 'Arduino Basics' Video Tutorial #2

So tonight I had a chance to work on the exercises in the Jeremy Blum 'Arduino Basics' video tutorial #2 again.

I had started on the #2 video about a week back, but last week needed to return the borrowed Arduino components to the friend from whom I had borrowed them. The official Arduino Starter Kit I had ordered from Amazon showed up on Thursday. So I now had the parts I needed to resume learning about the basics of microcontrollers.

Finally, tonight I had the time to open up the kit and pick up sort of where I left off with the first exercise in Blum video #2. Before I started the video back up, though, I tried to put together the the laser-cut wooden base for the Arduino and breadboard. Annoyingly, the Italian Arduino folks seem to have either neglected to include the screws for attaching the Arduino to the wooden base, or they forgot to specify the size for those screws when they wrote the book that comes with the kit. The book says to fasten the Arduino to the base with three screws, but that's all it says. I guess that's part of the DIY aspect of the kit. If you want to screw the Arduino to the wooden base, figure out the screw size 'yourself' and get them 'yourself'...

After reviewing a bit of the #2 video, I hooked up the Arduino Uno Rev 3 to a breadboard, a 10K ohm resistor, a switch and an LED (light emitting diode). I watched what Jeremy did in the video, I connected the components with the jumper wires, then I rechecked to make sure everything was the same as in the video. One issue I didn't think about the first time I hooked up this circuit was whether it matters which way the current runs through a resistor or, said another way, whether it matters which lead on a resistor is connected to ground. I tried looking that up in the
SparkFun tutorial on resistors, but couldn't find the answer. I decided to just make sure it was hooked up the same way shown in the video, and I'll search later on Google to find the answer about whether resistors are ok with current going either way through them.

With all the components hooked up, I connected the USB cable into my laptop, then into the Arduino. The LED was supposed to only light up when I pushed the switch, but as soon as I hooked up the USB cable, the LED started flashing on and off. Drat! Didn't do that before when I hooked it up. Unplugged the USB cable, then hooked it back up again. LED still flashed on and off.

Then I realized it was a brand new Arduino Uno, fresh from the manufacturer, and it didn't have the Arduino sketch, or program, uploaded to it yet which would make the LED only come on when I held down the button. Once I uploaded the program, which I had written a week ago when I had the borrowed Arduino, the LED worked properly, lighting up when I held the switch down and going off when I let up on the switch. Success!

Getting late, so time to stop for tonight. Tomorrow I'll try to finish Blum video #2.

**********

Saturday, May 24, 2014

Pip-Boy 3000: Wearable Wrist Computer

The Pip-Boy 3000 is an example of how microcontrollers are allowing makers to translate an imaginary futuristic product into a real-life, working item.

As a recent post on Singularity Hub explains:
"...The popular Fallout series of video games take place in a post-apocalyptic future where the world’s been decimated by nuclear war. The game’s Pip-Boy 3000 stores and displays maps, stats, inventory, and of course, scans for radiation. The real-world Pip-Boy 3000...uses an iOS app that displays maps and a variety of key environmental data like humidity, altitude, latitude and longitude, air pressure, temperature, and yes, radiation levels...The space wearables competition was part of NASA’s larger International Space Apps Challenge 48-hour hackathon. Teams were asked to design a wearable device for explorers in hostile, extraterrestrial environments. The Pip-Boy 3000 was made from off-the-shelf components including an iPhone 5, a Pinoccio microcontroller (i.e., an affordable mini-computer on a chip), a home-made geiger counter, and a Texas Instruments BLE4 sensor tag..."
As microcontrollers and the sensors that send them information become smaller but more powerful, DIY electronics enthusiasts and smart people with unfettered imaginations will do more and more of what the Pip-Boy 3000 team did -- make real-world working versions of interesting science fiction devices that could previously only exist in the mind of an imaginative author or the research lab of a large corporation.

Four emerging technologies or products used to make the Pip-Boy 3000 that would not have been available ten years ago to a small team with a limited budget are:

  1. Very small, low-cost and powerful microcontrollers
  2. Low-cost 3D printer
  3. Smartphone with access to all the maps and environmental data
  4. Home-made geiger counter
The same NASA Space Apps Challenge generated another emerging technology-enabled project, the Android Base Station. This team created a working, 3D printed, Arduino-driven satellite tracker that transforms a smart phone into wifi hotspot by connecting to satellites using a 3-D printed receiver. The Android Base Station can switch quickly between satellites to use the least expensive service available at any given time.

It feels like high school and college students over the next five years who don't learn how to use microcontrollers or can't translate their sketches and ideas into 3D printed realities are going to be missing out on a lot of opportunities. And that's not just true for engineering students. It also applies to artists, to clothing designers, to organic farmers and to many other careers or occupations.

One opportunity for the Humboldt Microcontrollers Group over the next few years will be to sponsor activities for young people (and for older ones too...) to be exposed to the world of microcontrollers and all the practical (and fun or interesting) applications there are for these tiny computing devices.

Almost makes you want to come to the next meeting of the Humboldt Microcontrollers Group on May 29 from 6 to 8 PM at The Link in Arcata, doesn't it?! Check out the Humboldt Makers Group website or their Facebook page for more details.

**********


Friday, May 23, 2014

Make: Potted Plant Protector

One Arduino applications that several people in the Humboldt Microcontrollers Group are interested in is a gardening project.

One possibility for getting started with an Arduino gardening project is the Potted Plant Protector that was in a recent Make post. This project uses three sensors to monitor the growing conditions of a plant, giving you detailed moisture, light and warmth information. A thorough gardening Arduino system will measure more than just those three types of data, but this is a good starting point. The Make post tells you what parts are needed for this Arduino project, and there's a video that guides you through the project. There are lots of other Arduino gardening projects to be found online, but this one is straightforward, relatively low cost and a quick way to get involved with microcontrollers and the world of plants.

Although this project won't be much of a challenge for the non-beginners in the Humboldt Microcontrollers Group, it might still be an excellent gardening project to start with. To make it more challenging, the advanced people could use the recommended hardware, then write their own code to monitor the growing conditions and display the data. After they have that working, they could download the sketches (Arduino programs) that Make has on their website for the project to compare how Make wrote the project programs and how the Humboldt coders structured the software.

Doing this project would also be a good start toward the aspects of Arduino gardening projects that don't necessarily involve electronic components and the initial programming to capture data. Those aspects include items like determining what moisture percentage is a good target for a given plant and figuring out how to measure the actual moisture, light and temperature levels for calibrating the sensor readings. Once the group has experience with those three sensors, we can figure out which additional sensors, such as soil pH, will give information needed for productive and interesting gardening.

At the May 29 meeting of the Humboldt Microcontroller Group, I'm going to suggest that people in the group who want to do an Arduino gardening project set a date for choosing what they want to do for the first phase of the project (I'll suggest they go with this Potted Plant Protector). By mid or late June, we should be able to have a microcontroller-monitored garden operating and generating information.

Then we'll have to figure out how to use that information to help the plants grow better!!

**********

Thursday, May 22, 2014

MCU Beginners: SparkFun Tutorials

For all us microcontroller (MCU) beginners, there are many online tutorials and other helpful web resources about electronics and related MCU topics.

A worthwhile set of tutorials for beginners participating in the Humboldt Microcontrollers Group 'learning the basics of using microcontrollers' sessions is the SparkFun Tutorials. According to the website there are 193 tutorials in the SparkFun collection. A beginner could spend weeks just reading the tutorials and never get any MCU hardware circuits built or software / firmware programs written for the MCUs. And if you start looking around at electronics tutorials that aren't on the SparkFun site, you'll have months of reading to plow through what the web has to offer.

As an alternative to having MCU and electronics beginners spend weeks or months reading tutorials, this post will point you to two particular SparkFun tutorials you may want to read if you're doing the first three Jeremy Blum 'Arduino Basics' video tutorials and you know nothing or very little about electronics.

In Jeremy's #2 video, one of the steps is to connect a resistor to the breadboard. Resistors come with many different values or resistances, which is often measured in ohms. Because you need to use resistors with specific values for different circuits, and because resistors don't have numbers on them to tell you how many ohms their resistance is, you need to be able to interpret the resistor color code to chose the correct value resistor for a given circuit. The SparkFun 'Resistors' tutorial will explain the color code and many other facts about resistors.

In Jeremy's #2 video, he also uses an electronics multimeter. You'll need to use the multimeter to
measure or check many things when you go through the 'Arduino Basics' video tutorials and probably in every electronics project you do after you finish learning the basics of microcontrollers. If you have previously used a multimeter and know how to use it to measure voltage, amperage and resistance, you're all set and don't need this tutorial. But if you're like me and haven't used a multimeter for a few years, or haven't ever used one, you probably want to read over the SparkFun 'How to Use a Multimeter' tutorial, or maybe the instruction manual for the multimeter you're going to use for your MCU or electronics work. As you can see from this picture of a SparkFun digital multimeter, there are quite a few settings for the meter selector switch, and only one of them will be the correct setting to use for checking a specific electronic component or circuit.

As you go through the 'Arduino Basics' video tutorials, there will be other topics you need to figure out or read about. If you like the SparkFun tutorials, check to see if they have a tutorial for your specific topic of interest. If they don't have a tutorial appropriate to your needs, do a Google search and you'll find lots of other tutorials or pages explaining the basics of whatever you're interested in. Another resource to remember is Wikipedia --- it's almost always a good first stop to read about the basics of any topic, including electronics.

A future post on this blog will list a bunch of links to online resources for microcontrollers. If you have any specific resources to suggest, or if you would like to see resources listed for a specific topic, send me an email at arcatabob (at) gmail [dott] com.

**********

Wednesday, May 21, 2014

PancakeBot: Microcontrollers To Make You Smile

So tonight's post about the PancakeBot show you just how much fun you can have with microcontrollers (and other bits of technology) once you learn how to use them.

A recent SlashGear post is about an Arduino-controlled pancake-printing 3D printer that prints out an
Eiffel Tower. The PancakeBot is an open source project, so if you want to 3D print your pancakes, there's information out there to help you put together a slightly-wacky machine that will do just that.

The video for printing the Eiffel Tower is worth watching, if only to see how well-produced the video is and what a great job they've done of getting the pancake printer to work.

But what I thought was even better was PancakeBot's "Breakfast Gallop" video. I went to the project's website and checked out their blog. The video of a pancake horse riding across the countryside would be a priceless memory to make with your kids. After 3D printing the props for the video and after making the video, the kids get to eat the props! How much better can it get?

**********

Tuesday, May 20, 2014

Blum Video Tutorials, Wiki, Trying To Learn

Tonight's work on microcontrollers involved too many things for me to get very far on actually making the Arduino perform tricks.

Because of not having enough hours in a day and trying to juggle too many balls at once, I wasn't able to watch all of the first three Jeremy Blum 'Intro To Arduino' video tutorials and do all the exercises in them before the May 15 meeting of the Humboldt Microcontrollers Group. I finally got back to working on the videos and exercises for a short time tonight. However, not too much progress was made in the short time I had available. Once again, too many irons in the fire...

Tonight I was working on the first exercise in the #2 video, which involves hooking up the Arduino and
a switch to a breadboard, writing and uploading a program to the Arduino, then using the switch to make the light blink. If all I was doing was connecting hardware, writing simple programs, then running the programs, I probably could have done all of the #2 video tonight.

However, in addition to 'connect hardware / write program / run program', I was trying to understand more about the hardware (e.g. reading some background info about LEDs). I was also trying to understand the code I was writing (e.g. making sure I knew where to use parentheses and where to use braces), creating new pages for the Humboldt Microcontrollers Group wiki, adding and revising content for the wiki pages, trying to figure out what to write for today's blog post, and trying to figure out how to use the multi-meter to replicate what Jeremy was doing on the video with his multi-meter. He didn't explain how to use the meter (you need to know how or figure it out on your own), so I had to read up on using a multi-meter.

To make significant progress on videos #2 and #3, I need to set aside a three or four hour block, probably on Friday night or Saturday. Hoping to get both videos done this weekend.

Stay tuned for more progress reports on my journey through the Blum video tutorials.

In a future post, I'll also discuss the details of the video tutorials and the electronic hardware needed for learning the basics of using microcontrollers with the Humboldt Microcontrollers Group.

**********

Monday, May 19, 2014

Skateboards and Microcontrollers

Because you can regularly see skateboards on the streets of Humboldt, the recent article in Gizmag about the Syrmo motion tracker caught my eye.

Miniaturization has made it possible to put sensors and embedded computers just about anywhere these days, including on skateboards. As it says in the Gizmag article:
"...A group of skaters from Buenos Aires, Argentina feel there's much to gain by tracking flips and spins and have developed Syrmo, a motion tracker that fits discreetly underneath the trucks to gauge everything from air time to the force of your ollie...With an accelerometer, gyroscope, microcontroller and Bluetooth 4.0 module built-in, the device is designed to replace the riser, a pad that some skateboarders will place underneath the trucks to make the board a little higher off the ground. Adding just 1 mm to the height of the board and weighing 50 g (1.7 oz), the company is confident riders won't notice a difference when riding with the device attached to their board..."
The Syrmo team recently launched a Kickstarter campaign to help them finish the software and to move from the prototyping stage to full scale manufacturing.

As expected, a Google search showed there are other skateboard+microcontroller projects out there.

Here's one with a PIC microcontroller and some LED 'headlights' and 'taillights.'

The E-Skate project has a detailed eight page pdf describing a college senior project to design and build an electric skateboard. The project presented in the E-Skate pdf used an Atmel ATmega328p microcontroller. The Arduino Uno also uses an ATmega 328 MCU. Maybe an HSU student will read the pdf and decide to build an E-Skate to zoom around the streets of Arcata. The picture to the right is a University of Central Florida electric skateboard senior project from a couple years ago from this video.

If someone wanted to design and build an electric skateboard in our area, I'm sure the Humboldt Microcontrollers Group would have fun providing assistance with the microcontroller part of the project.

**********

Sunday, May 18, 2014

Learn The Basics Of Using Microcontrollers

This blog post is for everyone who knows or sort of knows what microcontrollers (MCU) are and wants to learn the basics of using them.

There are three essential parts to using MCUs:
  1. Connecting the hardware (the electronic and mechanical parts of your MCU project).
  2. Writing and / or loading the software to operate the MCU.
  3. Figuring out how to use the MCU to accomplish something of interest to you.
If you live in the Humboldt region of northern California, the best way to learn the basics of using microcontrollers is to come to the regular meetings of the Humboldt Microcontrollers Group every other Thursday evening from 6 to 8 PM in The Link coworking space at 1385 8th Street, Arcata, California, USA. One of the primary goals of the Humboldt Microcontrollers Group is to help people new to MCUs learn how to use them.

Regardless of where you live, below are several suggestions about resources for learning the basics of using microcontrollers. To really learn about MCUs with any of the methods listed below, you will need to buy or borrow electronic components, and you'll need to write the software (or 'firmware') programs for the MCUs.
  1. Use online video tutorials.
  2. Use 'learn Arduino' or 'learn microcontrollers' books (do web search to identify those types of basic tutorial books).
  3. Use online text tutorials.
  4. Build MCU projects, either from kits or from 'scratch.'
  5. Buy electronic and mechanical components, use books or websites to figure out how to hook the components together, and use MCU info websites and MCU online forums to help with issues you can't figure out by yourself.
  6. If your area has a makers group, library or other organization that puts on 'basics of microcontrollers' or 'basics of Arduino' classes or workshops, participate in those activities.
If you come to the Humboldt Microcontrollers Group biweekly Thursday evening meetings, learning the MCU basics will consist of:
  1. Buying the basic hardware parts (a future blog post, and a Humboldt Microcontrollers Group wiki page, will discuss what parts are needed for learning about MCUs with the Humboldt Microcontrollers Group).
  2. Watching the appropriate video tutorials for learning MCU basics (a future blog post, and a Humboldt Microcontrollers Group wiki page, will discuss what videos to watch).
  3. Doing the MCU exercises in the videos (connecting and programming the MCUs) before each biweekly Thursday meeting.
  4. At each biweekly Thursday meeting, discussing any problems or questions you had when doing the exercises for that meeting.
  5. At the Thursday meeting, also discussing any other MCU questions you have and getting help from others at the meeting to answer, or figure out how to answer, your questions.
  6. After you learn the basics of MCUs, participating in the 'non-beginners' activities of the Thursday meetings, picking a project that involves using an MCU, buying and connecting the hardware for that project, writing the MCU code and working on the project at Thursday meetings.
So now you know how to learn the basics of using microcontrollers...

If you live in Arcata, Eureka, McKinleyville, Fortuna, Trinidad, Blue Lake, Ferndale or any of the other fine parts of the Humboldt region, please consider coming to the Humboldt Microcontrollers Group activities to learn the basics of using microcontrollers. Check the Humboldt Makers Group website or the Humboldt Makers Group Facebook page to find out the date of the next meeting.

Hope to see you soon at a Thursday night meeting!

**********

Saturday, May 17, 2014

Arduino Zero Launches!

Arduino has just launched a new microcontroller development board, the Arduino Zero. Two special features of the new product are an Atmel SAMD21 microcontroller (MCU) and embedded debugging.

Having an MCU with the 32-bit ARM Cortex M0+ core makes the unit much more powerful than an Arduino having the 8-bit ATmega328 MCU. The more powerful Arduino Zero should be good for complex robotics projects and will likely be a great introduction to 32-bit programming. (The MCU on the Zero also happens to be a very close relative of the microprocessor used in the Canary Instruments energy monitor...)

At the first Humboldt microcontrollers group meeting on May 15th, it was explained to me that one of the drawbacks of the Arduino platform is that it can be challenging to debug programming problems. The Arduino Zero has an embedded debugging system called EDBG. If interested in the details, check out Atmel's PDF for EDBG. The more advanced people in the Humboldt microcontrollers group may want to consider getting a Zero to see whether the EDBG system addresses most of the issues related to debugging Arduino programs.

**********

Friday, May 16, 2014

There's Gold In Them There Microcontrollers!

A recent article in EE Times titled "Is There Gold For EEs in Silicon Valley's Hills?" describes quite well one reason why people, especially college age or younger, should consider learning more about microcontrollers.
"The latest California Gold Rush (there have been many since 1849) is hardware startups. Businesses like Nest, Oculus Rift, and Makerbot have been acquired for princely sums. That, combined with the advent of crowdfunding sites and easy prototyping tools like Arduino and 3D printing, has encouraged lots of people to get out there and start panning for gold...It's really a great time to start a technology business, especially for hardware. I am seeing massive changes in how people design and prototype electrical and mechanical systems, manufacture those systems, and fund businesses that build and sell those systems...Development platforms are evolving, and many young engineers are learning Arduino for embedded programming before they learn C. They're more likely to get started on an Atmel AVR than a dsPIC. It also means that the field is still fairly wide open. These development tools are not yet fully entrenched. With a little bit of skill, knowhow, and some branding, you could build the next great hardware platform..."
The Humboldt microcontrollers group is intended to connect people in the region who already know how to use microcontrollers (and want to share their knowledge or learn more about these tiny electronic marvels.

For those Humboldt folks who don't already work with microcontrollers, or maybe don't even know what they are, this group is intended to help you learn about them and assist you in starting to make things with microcontrollers.

Who knows, maybe you'll meet someone at a Humboldt microcontrollers group activity and end up starting a new business with them!

If you weren't at the first meeting of the Humboldt microcontrollers group on May 15th, please consider coming to the next meeting. That meeting is on May 29th, from 6 to 8 PM, at 1385 8th Street in Arcata. Check out the Humboldt Makers Group website or their Facebook page for more info. If you have questions about the group or about microcontrollers, you're welcome to email me (Bob Waldron) at arcatabob [at] gmail (dott) com.

Hope to see you on May 29th!

**********

Thursday, May 15, 2014

First Meeting of Humboldt Microcontrollers Group

So I figured the first meeting of the Humboldt Microcontrollers Group (which was tonight, May 15, 2014) would be a pretty quiet one, likely just Nick and me, maybe one or two others.

It turned out that instead of two or three people, we ended up with nine people participating in the kick-off meeting for the group! If we have nine people, or more, show up at the biweekly meetings (next one is May 29, put it on your calendar), we'll have to figure out a bigger meeting area. But having lots of people show up is a good problem...

Tonight's meeting was mostly a meet-and-greet, finding out what each person's experience with electronics was (if any) and what will make it worthwhile for them to participate in some, most or all of the group's future meetings. The interests ranged from just learning about microcontrollers and how to make one do simple things, all the way up to making a tracking mechanism for a radio telescope.

For the May 29 meeting, the current plan is to start out with a short discussion and demo on one of the topics covered in the 4th Jeremy Blum Arduino video tutorial. We won't repeat what is done in the video, but Nick will pick one topic from the video, and he'll go a little more in-depth about that, or show and explain some aspect of the topic that Jeremy didn't include in the video.

After Nick does a short show and tell, we'll split up into a learner group and an advanced group. The learner group will discuss the topics and exercises in the 4th video, and make sure all the learners are up to speed on that, then go back over anything in the first three videos that people might not have had a chance to ask questions about tonight. Nick will facilitate the advanced group in working on a project or designing a future project, or he'll come up with some other way to get the advanced microcontroller people learning, teaching or just having fun making something with microcontrollers.

**********

Wednesday, May 14, 2014

A Good Humboldt Use For Arduino: Gardening

So yesterday I said I'd write a bit about Arduino, a currently popular type of microcontroller, or single board microcontroller.

Arduino is an open source hardware project that was started in Italy and has spread around the world in the past several years.

If you search on Google for Arduino projects, you'll get more than ten million hits. Arduino microcontroller boards are being used for just about anything and everything that people can think of. And one of those 'things' is gardening.

There are projects like Growduino, Garduino (which has been superseded by growerbot), and the Horto Domi Kickstarter project.

In the Humboldt Microcontrollers community activities, one of the projects I plan to work on is some type of application for Arduino in the garden. A recent post at Cooking Hacks was about the launch of their Open Garden Project. The post says:
"...there is a lot of interest in urban or terraces vertical gardens that allow grow vegetables in the city centers controlling firsthand the level of fertilizer used. This week, we are happy to announce our newest product: Open Garden. We put our knowledge of electronics and sensors at the service of gardening and hydroponics, trying to help all of you interested in gardening and plants. Open Garden is a platform for garden control using sensors oriented both exterior and interior gardening or even hydroponic farming. The aim of the platform is to measure parameters such as Soil moisture (Indoor & Outdoor kits), Water sensors: pH, Conductivity, Temperature (Hydroponics kit), and Temperature, Humidity and Light (All kits)...Open Garden programming has been developed as Open Source so that users can access the source code to customize and adapt to their needs..."
We'll probably discuss some Arduino gardening applications at the May 15 meeting, so if you're interested in either automated gardening or the video tutorials about the basics of Arduino, come to The Link at 1385 8th Street, Arcata, CA, USA, from 6 to 8 PM on Thursday, May 15.

Hope to see you at The Link! If you have questions about the Humboldt Microcontrollers community, send me (Bob Waldron) an email at arcatabob (at) gmail [dott] com.

**********

Tuesday, May 13, 2014

Humboldt Microcontrollers Community

Microcontrollers are about to become a part of my life.

That is to say, I'm going to learn a few things about microcontrollers, which were already involved with many parts of my life.

If you live in Arcata, CA, or elsewhere in the Humboldt County region, you should consider participating in a new activity in the area -- the Humboldt Microcontrollers community. To start out with, we're going to meet every other Thursday from 6 to 8 PM at 1385 8th Street, Arcata, CA, USA. The first meeting will be this week, on May 15, 2014. The purpose of this new intentional community is to get together on a regular basis with other people who want to learn about microcontrollers and / or want to share what they know about them.

If you like microcontrollers or are interested in learning more about them and you live in Arcata, Eureka, McKinleyville, Fortuna, Trinidad, Blue Lake or any of the other fine parts of the Humboldt region, please connect with us. Even if you can't show up every other week, we'd love to find out who all the members and potential members of this new community are and how we can work with you, help you learn and learn from you.

So what are microcontrollers?? They're basically little computers. Wikipedia says a microcontroller is "a small computer on an integrated circuit containing a processor core, memory, and programmable input/output peripherals...used in automatically controlled products and devices, such as automobile engine control systems, implantable medical devices, remote controls, office machines, appliances, power tools, toys and other embedded systems." So you've likely got a few of them in your car, in your electric drill, in lots of the newer electronic toys, in your cable tv set top box, and in your fish locator.

The Humboldt Microcontrollers community activities are being organized by the Humboldt Makers Group, a local organization of people interested in DIY activities of all sorts, a group for people who are part of, or would like to be part of, the 'maker movement,' even if they don't know what the maker movement is. Probably the best way for now to keep track of the Humboldt Microcontroller community activities is to watch the Humboldt Makers Facebook page. Microcontroller community activities will be posted there as well as a few pictures of microcontroller projects and other topics of interest to makers.

I'm going to use this blog to reach out to people in the Humboldt area to invite them to participate in the Humboldt Microcontrollers community if they already know what microcontrollers are. I'm also reaching out to others in the region who don't know what microcontrollers are, but might really enjoy or benefit from working with microcontrollers and 'making' things that are controlled by or assisted by microcontrollers. It will be lots of fun seeking out both types of people, meeting new people who can teach me lots of interesting stuff about microcontrollers and new people who I might be able to help learn about these powerful devices. Or if I can't teach them, maybe I can learn with them.

I'm also using this blog to chronicle my Adventures With Microcontrollers. I'm starting my learning pretty much from scratch. Meaning I haven't programmed these devices or built anything with them before. And I don't know much about electronics. So if you read a little about microcontrollers and think it might be fun to learn a little more, please join me and a few other people every other Thursday. Don't worry if you don't know anything about microcontrollers or electronics -- show up anyway. And don't worry if you can't come on May 15 -- just show up whenever you can. Check the Humboldt Makers Facebook page for up-to-date info on meeting times.

Tomorrow I'll write a little bit about the Arduino, the single board microcontroller we're going to use for learning the basics of what a microcontroller is, how you connect and program them, and what you can use them for. In other future blog posts, I'll talk about interesting and useful applications for microcontrollers in Humboldt Country, do more in-depth explanations of what the different parts of a microcontroller are, explain what electronic components are needed to learn about and use microcontrollers, and I'll try to find reasons and ways to convince Humboldt area people to come join us in the learning and sharing of knowledge and skill with microcontrollers.

If you have questions about the Humboldt Microcontrollers community, send me (Bob Waldron) an email. The address is arcatabob [at] gmail (dott) com.

**********