 |
| microSD card with adapter |
One way to save data generated by sensors on an MCU project is to use a microSD card. The microSD card (SD means Secure Digital) is a relatively compact and inexpensive way to store digital information. The microSD card is 15 x 11 x 1 mm, and an 8GB Class 10 microSD card can easily be found for $5 to $10 as of June 2014 in the US. Many smartphones or other mobile computing devices use microSD cards for expanding the memory capacity of the devices.
 |
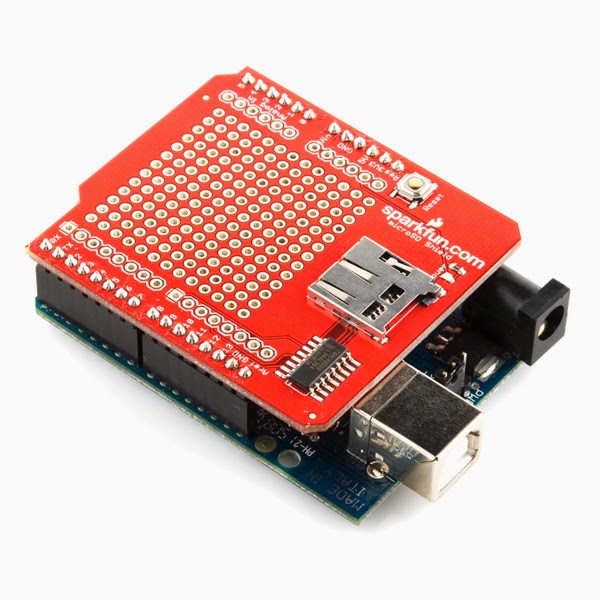
| SparkFun microSD Shield |
Today we'll take a brief look at the relatively easy approach to saving MCU project data -- using a microSD card add-on for an Arduino. If you go the 'microSD addon for Arduino' route, there are likely less expensive options, but the two safest ways I know of for an inexperienced MCU person is to go with the SparkFun microSD Shield ($14.95) and their microSD Shield Quickstart Guide or use the Adafruit microSD breakout board ($14.95) and their microSD breakout board tutorial. Ed Smith has experience with the Texas Instruments LaunchPad MCU board, so maybe he can do a future post about microSD BoosterPacks, and whether that data storage approach is significantly less expensive or easier to hook up and program.
I haven't used either the SparkFun or the Adafruit microSD add-on component, so this is the voice of research, not the voice of hands-on experience. After I build a data-gathering MCU project, like a gardening project that measures soil moisture or light, I plan to use one of the microSD card approaches to save the data from the sensors. At that point I'll write another blog post to discuss the process to hook up the microSD reader to the other electronics and highlight any issues I run into with the microSD add-on.
 |
| Adafruit microSD breakout board |
The Adafruit microSD breakout board may have advantages, such as smaller board size, compared to the SparkFun microSD Shield, but if the other project components can accomodate the Shield, the inexperienced MCU project builder might be better off with the Shield because it's a more straightforward approach. Compare the SparkFun Shield picture, above left, to the Adafruit breakout board and breadboard approach, shown to the right. If your project is going to have other components that you'll need the breadboard for anyway, the Adafruit approach might be nice so you have better visibility for jumpering parts together and observing the operation of the Arduino once you've got the entire project connected. Only the hands-on experience following the tutorials for the SparkFun or Adafruit microSD card modules will show whether one approach is easier to get operating or more reliable once your project is actually being used for its intended purpose.
Another approach to using microSD cards with MCUs is to make your own circuit board and buy the MCU itself and a microSD card reader. I'll cover that approach in the future after we start designing circuit boards and getting them fabbed. And I'll also need to do a bunch more research about interfacing the MCU and microSD card reader.
To give readers of this blog a better perspective on using microSD cards with MCUs, or other ways to save MCU project sensor data, I will try to get one or several posts written by people who've successfully built projects that saved the sensor data. If you've done that and are willing to write a post about it, please contact me via email at arcatabob (at) gmail {dott} com. Thanks!
**********
No comments:
Post a Comment